The Problem
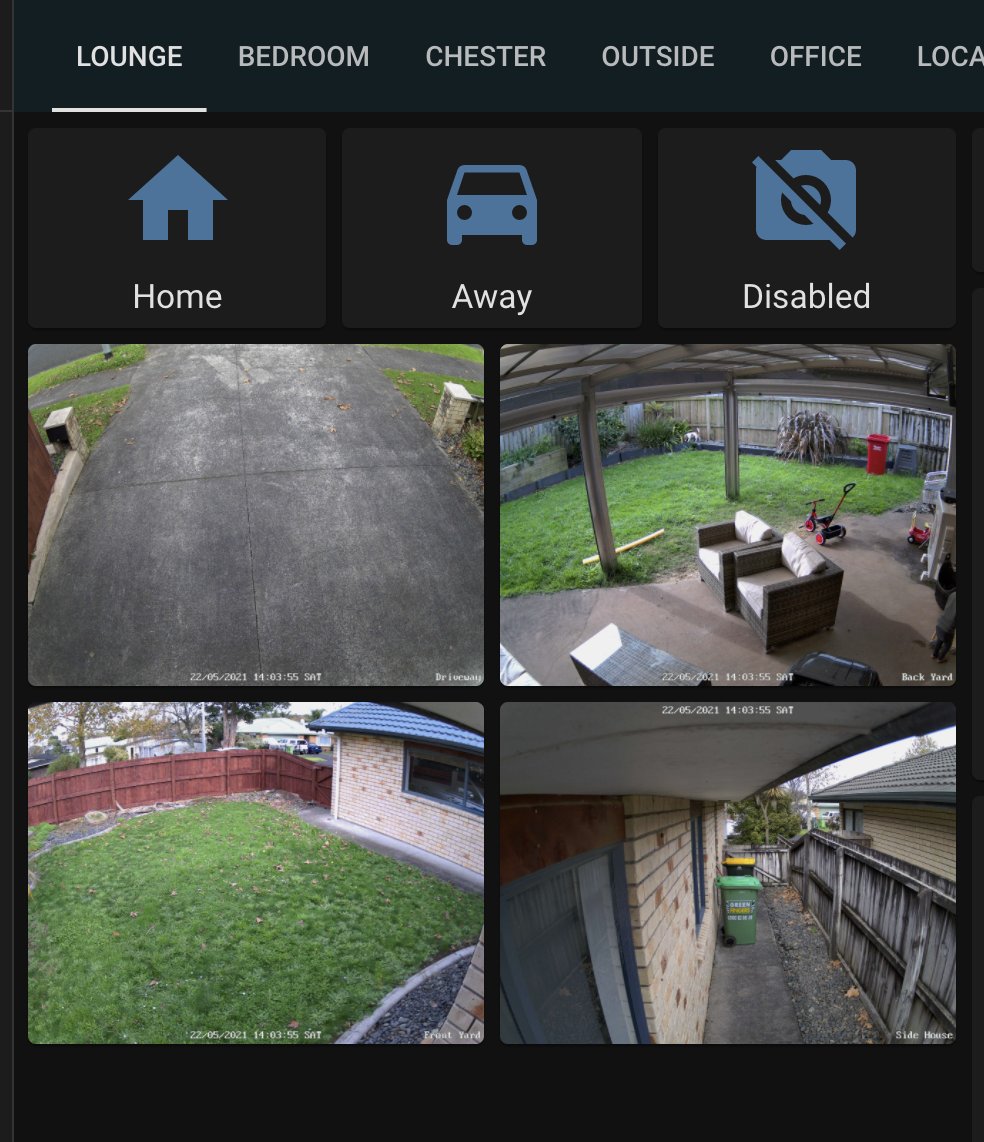
The Reolink app allows you to create “scenes” or modes to set a “Home” or “Away” profile, turning on/off motion alert notifications.
However when using an NVR you only have the option to set it for all cameras, not camera specific.
The Situation
My property has a few Reolink NVR cameras located in various places outside the house. I specifically have one in the backyard which I would like to have recording 24/7 but also have notifications disabled while I am at home. The rest of the cameras should be recording and have notifications enabled. Reolink’s solution does not work for this case.
To sum up, I need 3 specific scenes:
- “Home - some cameras enabled”,
- “Away - All cameras enabled”,
- “Disabled - All cameras disabled”.
The Solution
If we look through the Reolink admin system we can see that it provides a secondary option of setting specific times you’d like recieve notifications for motion/people or vehicles detected.
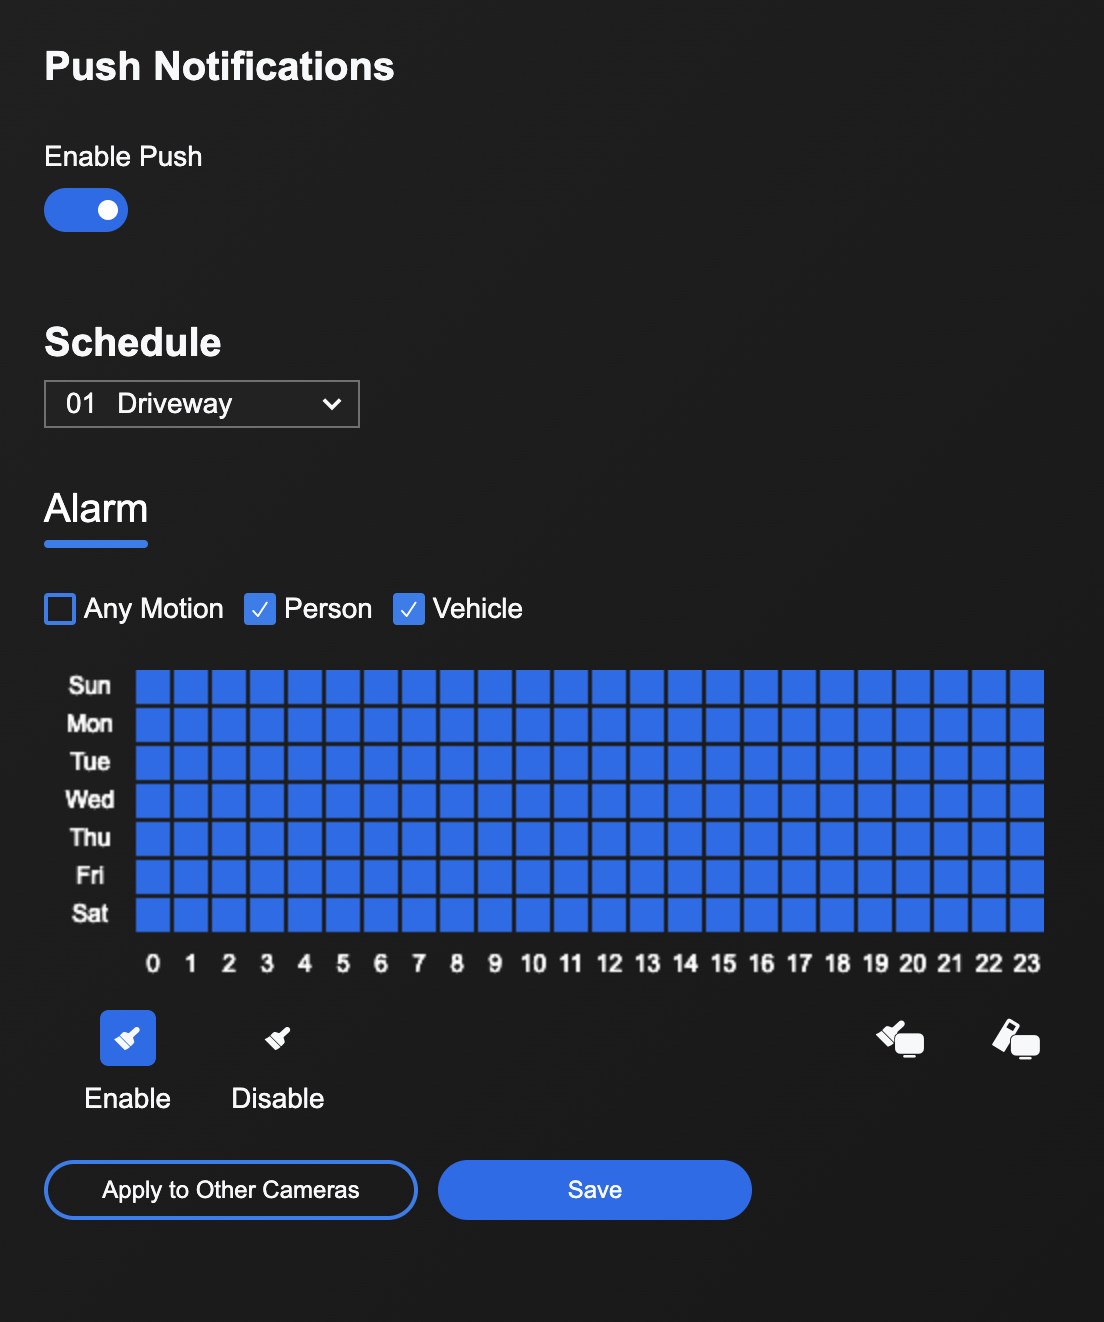
In theory (proven right) we could exploit this feature to create our own custom scenes and modes by disabling/enabling time blocks on demand for specific cameras while keeping push notifications enabled for the rest.
Digging into the admin system
The admin system is web based so we can use Chrome Dev Tools to analyse what is being sent over the network. By editing some of the “time blocks” and saving the settings back to the NVR system we can see an XHR event sending a payload that contains everything we need.
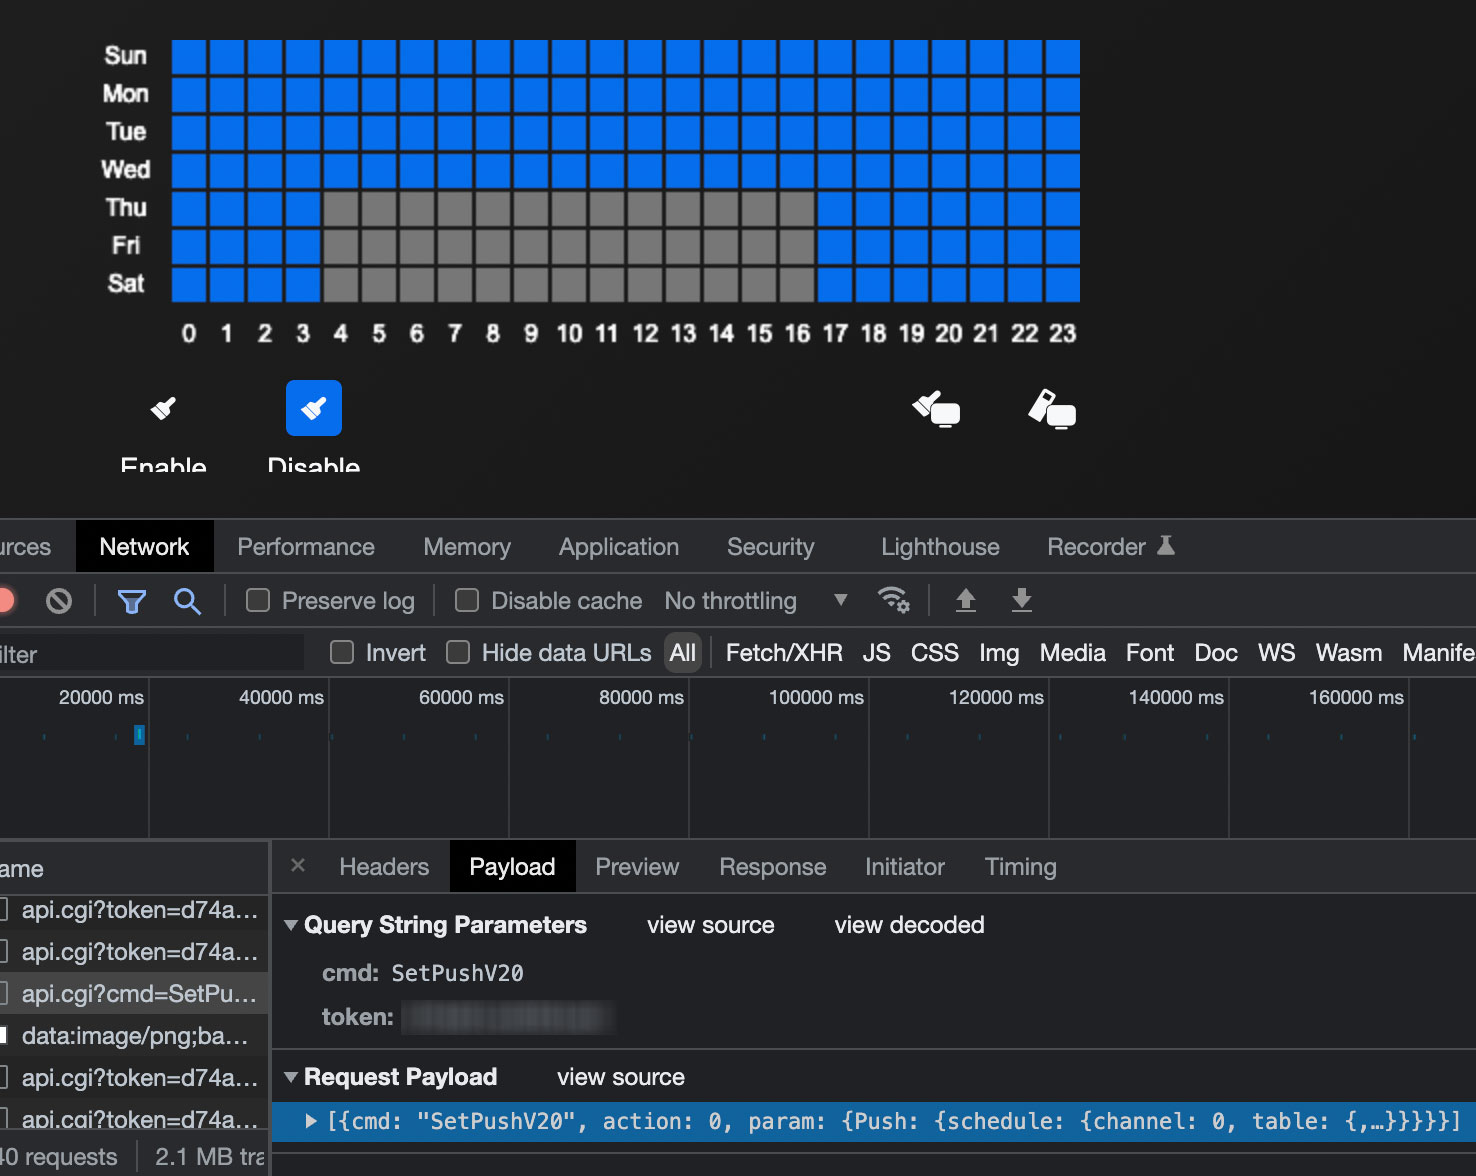
We should be able to replicate this POST request back to the NVR system on demand using our Home Automations systems like Home Assistant or HomeBridge. The payload being sent back is the below:
[
  {
    "cmd": "SetPushV20",
    "action": 0,
    "param": {
      "Push": {
        "schedule": {
          "channel": 0,
          "table": {
            "AI_PEOPLE": "111111111111111111111111111111111111111111111111111111111111111111111111111111111111111111111111111100000000000001111111111100000000000001111111111100000000000001111111",
            "AI_VEHICLE": "111111111111111111111111111111111111111111111111111111111111111111111111111111111111111111111111111100000000000001111111111100000000000001111111111100000000000001111111",
            "MD": "000000000000000000000000000000000000000000000000000000000000000000000000000000000000000000000000000000000000000000000000000000000000000000000000000000000000000000000000"
          }
        }
      }
    }
  }
]
We can see a few interesting things in here that we’d need such as:
- cmd: SetPushV20 - Command to set push notifications
- channel: 0 - The camera channel you’re setting
- AI_PEOPLE, AI_VEHICLE, MD - The type of motion detection
- 1 and 0’s - These represent each time block
Gathering everything we need
We have the payload data, but we can see the admin system also requires a token (duh) for security. But with some googling I found out we can include our NVR’s username and password directly in the link we POST to, along with a few required paramaters as well.
http://[IP_ADDRESS]:80/api.cgi?cmd=SetPushV20&channel=0&user=[USER]&password=[PASS]
Now we can succesfully POST back to the NVR system and change settings for the cameras on demand.
Putting it all together
This depends on what home automation system you’re using however I have tested this in Home Assistant and I’m now currently using it with HomeBridge.
Home Assistant
You’ll want to use Home Assistant’s RESTful Command. The code below will turn on 24/7 AI_PEOPLE and AI_VEHICLE motion detection for channel/camera 0. (Notice ‘channel’ is listed twice, in url and JSON)
driveway_push_on:
    method: POST
    url: http://[IP_ADDRESS]:80/api.cgi?cmd=SetPushV20&channel=0&user=[USER]&password=[PASS]
    payload: '[{
    "cmd": "SetPushV20",
    "action": 0,
    "param": {
        "Push": {
        "schedule": {
         "channel": 0,
            "table": {
             "AI_PEOPLE": "111111111111111111111111111111111111111111111111111111111111111111111111111111111111111111111111111111111111111111111111111111111111111111111111111111111111111111111111",
             "AI_VEHICLE": "111111111111111111111111111111111111111111111111111111111111111111111111111111111111111111111111111111111111111111111111111111111111111111111111111111111111111111111111",
             "MD": "000000000000000000000000000000000000000000000000000000000000000000000000000000000000000000000000000000000000000000000000000000000000000000000000000000000000000000000000"
         }
          }
        }
     }
    }]'
HomeBridge
For HomeBridge I’m using the HomeBridge-HTTP-Switch-Plugin. Your HomeBridge config should look something like this:
{"accessory": "HTTP-SWITCH",
            "name": "Cam Driveway On",
            "switchType": "stateless",
            "onUrl": [
                {
                    "url": "http://[IP_ADDRESS]:80/api.cgi?cmd=SetPushV20&channel=0&user=[USER]&password=[PASS]",
                    "method": "POST",
                    "headers": {
                        "Content-Type": "application/json"
                    },
                    "body": [
                        {
                            "cmd": "SetPushV20",
                            "action": 0,
                            "param": {
                                "Push": {
                                    "schedule": {
                                        "channel": 0,
                                        "table": {
                                            "AI_PEOPLE": "111111111111111111111111111111111111111111111111111111111111111111111111111111111111111111111111111111111111111111111111111111111111111111111111111111111111111111111111",
                                            "AI_VEHICLE": "111111111111111111111111111111111111111111111111111111111111111111111111111111111111111111111111111111111111111111111111111111111111111111111111111111111111111111111111",
                                            "MD": "000000000000000000000000000000000000000000000000000000000000000000000000000000000000000000000000000000000000000000000000000000000000000000000000000000000000000000000000"
                                        }
                                    }
                                }
                            }
                        }
                    ]
                },
That’s it.
Now you can create custom buttons or scripts within your home automation systems to all the custom scenes and modes you want. While I was running Home Assistant I created virtual buttons on the frontend that ran scripts enabling/disabling each camera programatically.
Extra tidbits
The model I am using is the ReoLink RLK8-520D4-A with 4x RLC-520A Turret Cameras. I believe you can get other models to work by setting the CMD “SetEmailV20” to “SetEmail” and so forth.
Thanks for reading. Follow me @Sudo_Overflow on Twitter for more.